Are you thinking of running Facebook ads to promote your business? If so, you’ll want to have a Facebook pixel installed on your website before you start running ads! I’m going to show you how to put a Facebook pixel on your WordPress site without losing your mind.
A pixel is a little tracking device that goes onto your website to let Facebook know who your visitors are. If you are planning on doing ads, whether now or in the future, the Facebook pixel is what will allow you to do that easily. It’ll keep track of people who visit your site that you can target them with your ads.
For some reason, there really aren’t any great clear cut directions on Facebook’s website on how to set that up, and so that’s what we’re going to do today. I’m going to walk you through how to create a pixel and Facebook’s business manager and then how to connect that to your WordPress site.
Step 1: Set Up a Business Manager Account

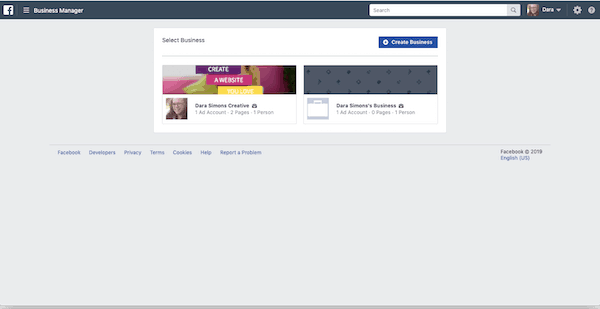
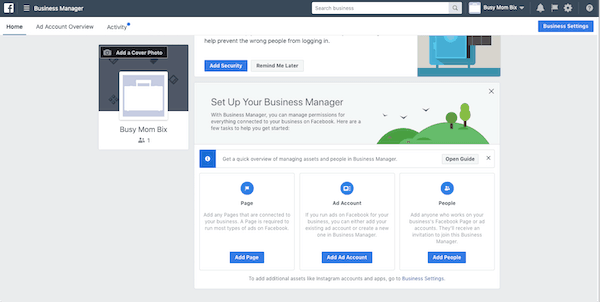
The first thing that you’re going to need to do is to log into your Facebook business manager. If you have not yet created a business manager account, you’re going to need to do that first. Visit business.facebook.com to set up your Business Manager account.
Then click on the blue Create Business button. Fill out your business’s information. (Tip: Don’t want to share your cell number with Facebook? Create a free Google Voice number and use that for your business line.) You’re then ready for the next step.
Step 2: Create an Ad Account

Now we’re going to go to ad account. We’re going create a new one if you don’t already have one. Give it a name based off of your business. Pick your current time zone, your currency, and then click next.
Select whether this ad account is for your own business or a client’s business. If you’re creating an account for a client, you would want to do that separately. You can create Facebook accounts on behalf of clients. You just want to make sure to add them to it.
So I’m going to select myself as the person who has permission to do all of these things and then click assign. Now my ad account has been added to my business manager. Hit close.
Step 3: Create a Facebook Pixel
![]()
Now we’re going to search in the top here for pixel. Facebook’s going to create a pixel that you can use on any and all of your accounts. It’ll all be linked to one account. You just need to create a pixel once. If you have multiple websites, if you use lead pages or click funnels or anything like that, all of this goes with one Facebook pixel.
So we’re going to create pixel and you have the option of adding in your URL here and then click on create. You can create up to a hundred pixels within your business account. But if everything is linked to one business, we just want one pixel for all of that.
Step 4: Add Facebook Pixel to Your WordPress Website
![]()
Now it’s going to give us a code to put on our website. I’m going to install using WordPress. Now it’s going to download the Facebook pixel extension. We’re going to upload this right onto WordPress. So click on the download button and then hit continue. And it’s going to show us that we’re going to install this like a plugin right onto our WordPress site. So I have my plugin page already pulled up. I’m going to click on add new. And then upload plugin.
And I’m going to drag this file right into here and then click install it. And then activate plugin.
Step 5: Verify Your Pixel Works
![]()
Go back to your Facebook Pixel, click on the continue button going through. That’s what we just did.
And then we’re going to enter our URL to test to make sure that it’s working properly. Facebook will send your site test traffic to make sure that everything is working correctly.
After a few minutes, your pixel becomes active. It usually takes less than 60 seconds, but if it hasn’t worked by then, just keep trying that. It’ll go to active and then you can hit continue and you are ready to go.
And you can test your events if you’d like to do that, or create an ad. I would suggest leaving your Facebook pixel on before you create an ad. You want to make sure to get that targeted traffic in there before you start setting up ads.
How Soon Should You Set Up Your Facebook Pixel?
This is best to do really as soon as you possibly can. You want to create a pixel as soon as you get your website up so that when you’re ready to create ads, you are good to go.
Do you have any questions? Leave a comment and I’ll be happy to help you out.
